The Background
Reporting—whether operational or regulatory—can quickly become complex. As the demand for more information grows, reports often expand into multiple pages. Until now, Waterly Rounds handled this by generating each page as a separate PDF, which meant users had to either send them out individually or take the time to combine them into a single document.
To simplify this process, we’re introducing a new feature Report Grouping! With Report Grouping, you can organize individual reports into a group with a meaningful name. Waterly Rounds will automatically combine the grouped reports into one PDF, making it easier to email, print, submit to the State, share with your team, or include in a board packet—no manual merging required.
In addition the ability to preview a report in a new browser tab has ben added.
As with all editing functions, Report Grouping is available to users with supervisory permissions in Waterly.
Setting up Report Groups
To start setting up Report Groups, navigate to the Reporting area of Waterly Rounds:

From the Reporting screen, click the three vertical dots (⋮) in the upper-right hand corner of the Waterly screen (remember - those assigned supervisory or abovepermissions in Waterly have editing capabilities). This opens the action menu. Click Enter Edit Mode. Edit mode opens the report grouping function as shown below. When finished adding/editing report groups, click Exit Edit Mode to return to normal reporting operations.
Edit mode opens the report grouping function.
Creating a Report Group

Simply select all the reports you’d like to put into a group, by selecting the box next to the report name, and choose the “Create Report Group” option. A box will pop up, prompting a report group name for easy identification. Give it a name, and you’ve created a Report Group!
🌟Pro Tip: You can click one report, hold down the shift button and click another box to multi-select all the reports in between.
Report Groups - Next Steps and Additional Tips
Now that a Report Group has been created, there are now two types of reports: Grouped and Ungrouped.
While in Edit Mode, you have the option of archiving by clicking the archive icon. None of the individual reports themselves will be archived (and of course, no data is ever deleted), they will simply be moved to “Ungrouped Reports”.
Additionally, once the group is created you can access the individual reports by clicking the down arrow "∨". This will open the group to display the reports for individual editing or downloading. For instance, if edits are needed to a page in the report grouping, these edits will need to be made in the individual report. Then close the group by clicking the up arrow "∧".

Multiple report groups can be created and named for easy reference. These groups will automatically sort in alphabetical or numerical order. You may consider numbering the most used groups by number, i.e. 1. MOR/DMR, 2. Operational, etc. At this time a report can only be added to one group.
Using Report Groups
Once a report group is created, you can download individual reports, but you also have the capability to download a single PDF document containing all of the reports in the group. Simply click the PDF icon on the report group header to generate all reports in that group as a single PDF. The file is now ready for review and submittal/sharing.

Note that at this point, you only can add a report to one group. If you want to add the same report to a different group, you will have to create a duplicate report and add it to a different report group.
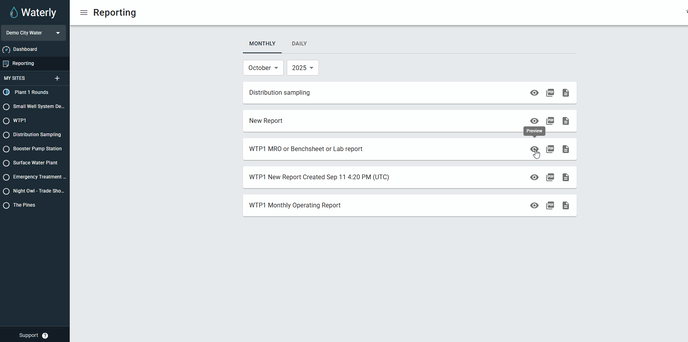
Preview Option
Before saving a report for printing or sharing, a new preview button has been added. Tapping this icon opens the report in a new tab without downloading the file.
Conclusion
Report Groups make it easy to keep multi-page reports organized and ready to share. By grouping reports together, you save time and keep everything in one place for smooth collaboration and submittals. Previewing the report makes reviewing the data easier and reduces the number of downloads needed to sort through.